The Making of : William Tell
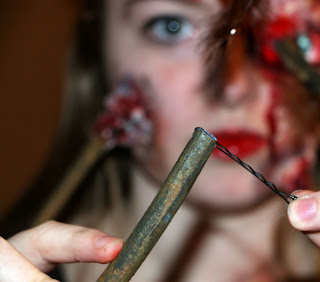
The thought of using thin wooden doweling as arrows crossed our minds, but got turfed pretty quickly as they would be extremely difficult to keep on the face due to weight. We ended up cutting different lengths of foam tubes and painting them to achieve an aged wooden look. We then glued the feathers and ruffled 'em up a bit to look used.
Next it was a matter of wiping the blank looks off of our faces to the question "What style of hair did women wear in William Tell's era?" with a quick Google search. Turns out, the fancier and more ornate the better, but this wasn't going to be a look about hair, so we opted for a simple "peasant girl" braid hairband flipped over the top.
Onto face planning. The eye had to be covered as we were planning to put an arrow straight through it and would be applying latex and gelatin mix around it. You want exactly none of these items to touch your eyeball, hence the patch. Safety first. At this point we also dotted the locations we planned to SKEWER.
We wanted a place to plant the arrow we would be sending through the eye so we decided to make one using a simple foil mould and gelatin mixture with some white paint added to it. You can see some chunks in there, and usually we would want a nice blended chunk-free mixture, but none of this was going to be visible in the final product.
While waiting for our fake eye to set we applied the bruises that would frame the arrows. Bruising was done by blending many layers of red/brown/yellow/blue and purple makeup. You want to do many layers of delicate application rather than going dark and opaque to maintain realism.
Our eye was set and even though it ultimately was going to be mostly covered, we did a quick iris just in case and also because it was fun.
We then began to affix the arrows by winding latex soaked cotton around them and applying the the skin. It was super gross and fun. Please remember if you are applying this kind of thing to your face to Vaseline any hair that you would prefer to keep.
We also added a wee bit of fake blood to the wounds. Just because if you are going to get an arrow or five to the head, there is going to be a bit of blood.
Next important detail was to properly align the arrows that had fully pierced the heads. They were lined up and attached to the back of the head using bobby pins.
You can then do your regular makeup around the non shot through the head parts of the face. Make sure to include a blood red lip.
Thanks for checking out our How To on this one, it was an idea we were pretty stoked to work on. See you next Sunday for a new look!
If you would like, you can follow us on social media to be updated when we post:
Instagram: altered.evolution.fx
Twitter: alt_evolution
Facebook: https://www.facebook.com/alt.evolution
Tumblr: alteredevolutionfx


No comments:
Post a Comment